Video

How to Use the Wall to Practice a Handstand Straddle Press

Pressing into a handstand can be tricky business! The secret rests in learning to use the extensors of the back to enter the pose. Check out this short tutorial for some tips and tricks that can be used to figure out the mechanics of getting your hips above your shoulders.

Learn to Meditate in Five Easy Steps

ImageLife can be a little crazy sometimes. Because of this, it’s no surprise that we all get stressed out at one time or another. While some of the things that set us off have their origin in major life challenges, many of the experiences that get us all wound up are based in minor daily irritations. The stress caused by things such as slow traffic, difficult coworkers, and piles of unanswered emails can really build up into a full-blown meltdown if left unchecked.

Though we may have limited control over the things that challenge us, it’s important to remember that we’re not completely helpless in these situations. The great meditation master Shantideva once reasoned that since we don’t always have the ability to control external situations, we should insead concentrate on the one thing that we can directly influence — namely the state of our mind.

In Shantideva’s view, learning how to keep the mind peaceful and tranquil by protecting against destructive emotional states such as anger, fear or anxiety is the key to remaining happy when you run up against overwhelming stressful experiences. Metaphorically, he compared protecting the mind in this way to being able to walk around an entire thorn-covered planet by wearing a thick pair of shoes, instead of traveling limited distances with bare feet by attempting to pull out one thorn at a time to create a path.

So how do you do this?

While there are many ways to calm the mind, recent studies support Shantideva’s theory that a regular meditation practice can help you reduce adverse reactions to stressful situations. Taking even a few minutes out to mindfully focus on your breath every day can really help you clear away anxiety and cut through fear and worry. As you practice, however, be patient. Like most things, learning to calm your mind takes some practice and effort. Keep with it though, and you’ll discover a wonderful tool that you can use to protect yourself when you experience a thorny situation in life.

Are you ready to try meditation? Learn to calm your mind by following these five simple steps.

1.  Set an an alarm clock to help keep track of the time. Begin with three minutes, and work up to five.

2.  Find a comfortable, seated position (feel free to sit in a chair if you’re not comfortable on the floor).

3.  Sit up tall, rest your hands in your lap and close your eyes. Your palms can face up or down. Simply choose the one that feels the best.

4.  Take a few moments to relax and settle in. If any part of your body feels uncomfortable, mindfully shift to a new position.

5.  Once you feel relatively comfortable, redirect your mind to your breath and begin counting your exhales. Set an initial goal of counting a total of 21 and build up to 108 with practice. When your mind wanders, refocus by drawing awareness back to your breath, and begin the count again.

For best effect, practice this meditation for three to five minutes each morning, noon, and night to counteract the effects of stressful situation throughout your day.


Learn How to Balance on Your Elbows in 90 Seconds

Screen shot 2013-04-25 at 3.28.27 PM

Sayanasana (the couch posture, more commonly known as an elbow stand) is most commonly found in the Ashtanga fourth series. I’ve also seen pictures of BKS Iyengar demonstrating the posture in Light on Yoga.

This crazy pose is a notch or two harder than the typical forearm stand and is as meditative as it gets, since thinking about anything else at all typically results in an epic crash and burn. This, coupled with the focus required to balance, will momentarily clear your mind like nothing else.

Caveat Emptor: This pose is serious business! Stay safe by making sure that you have someone to spot you, use a wall to practice, or come visit me in Boston and we’ll give it a go together.

Want to see how to do this pose?  Check out the link below:

Melt Away Your Stress – Guided 10 Minute Meditation

Hi all,

I recently wrote this piece for the Huffington Post, and thought that I’d share here as well.  Make sure to share with anyone who would benefit!

We live in a fast-paced world, and balancing the demands of daily life can be pretty stressful. Deadlines, financial responsibilities, testy managers and gridlock can all cultivate an environment of chronic stress that can have adverse effects on your health. While a certain degree of stress is to be expected, letting it control you just isn’t good for you! A really simple way to help you stay balanced and get back to center can be easily experienced through guided relaxation.

Guided relaxation practices provide a simple coping mechanism to help deal with the effects of chronic tension. These exercises can be practiced nearly everywhere and provide a healthy option for managing the effects of stress and anxiety. Specifically, theMayo Clinic’s online guide to stress management states that guided relaxation techniques can be used to release muscle tension, lower blood pressure and slow the heart and breath rates.

This week, I’ve collaborated with award-winning contemporary acoustic artist Meg Hutchinson to create an 11-minute guided relaxation practice that you can do at home. Practice it for a week and watch the stress melt away!

Stressed out? Check out the guided meditation practice below.

Postural Inspiration: Bharadvajasana aka “the Twisty Hero’s Pose”

Written by guest blogger and PVYU Yoga teacher Nicholas Capobianco

Nick Capobianco demonstrating “the twisty hero’s pose”

The Pose

I was exposed to this pose by David in my very first Pranavayu accelerated class and I have been in love with it ever since! It is a twist (literally) on one of the oldest poses as outlined in the Hatha Yoga Pradipika: Virasana, or “Hero.”  These days Hero is typically seen as a symmetrical pose done in either the seated or supine position, but in the old days Virasana was an asymmetrical meditation posture and only had 1 leg in half-hero position while the other foot sat on top of that hip in half-lotus.

Wanna try it?  

Once you are comfortably seated in the general position, place your opposite hand on the knee of the half lotus leg, while reaching behind your back with your other hand to grab the toes of the half lotus foot.   Once completely bound, lengthen upward through the spine as you draw your shoulders back and down and proceed to enter one of the “cleanest” twists you will ever experience in Yoga!

Need to Modify?  

Can’t do half-lotus yet and still want to give it a try? No worries! You can make this one easier by drawing your lotus  foot to the inner thigh of the hero leg instead.  From there, just reach around your back and grab a handful of clothes or your inner thigh to anchor the twist.

The Benefits

Aside from the usual Latisimus Dorsi & Oblique stretches you get from twists, this version really allows you to keep the hips and sacrum anchored to facilitate some extra external rotation hitting the Glutes and IT Band as well.  Overall, this is a terrific pose to do after any backbend sequence

Cool Yoga Tricks – The Hanging Bow Assist

The hanging bow posture is an amazing partner yoga pose that  gives a really nice stretch to the chest, abdominal muscles, and hip flexors.  This pose is also wildly entertaining,  so you might consider giving it a go  with a friend if you’re flexible enough to comfortably hang out in the bow pose on your own.

If you decide to try this one out, have your friend enter the bow posture.  Carefully  thread your feet through your partner’s arms and rest your feet near either side of their waist.    Once you’ve gotten into the general position,  wrap your hands around your partner’s feet just under the heels. Bend your legs, keep your back straight, and gently pull upward.  Check in with your partner to make sure that everything is going well, and if they give you the green light, gently lift them upward and off of the floor.

Once they’re up, hang out for a bit, and lower them gently back down to the floor when they’re ready to descend.

NB:  If your partner isn’t ready to lift all the way, a gentle upward pull on the arms and legs still feels great.  Start with that and build to the full lift with practice.

What about you?  Got any cool yoga tricks to share?

Postural Inspiration – The Twisting Horse

This version of the twisting horse stance has to be one of my all time favorite standing postures.  I like it because the wide stance makes the posture feel very stable, and the twist created by pressing outward with one hand and downward with the other feels absolutely incredible.  The posture, (which seems to be a hybrid of a classical martial arts posture applied to yoga) increases spinal rotation, builds some serious strength in the legs, and quickly increases flexibility in the muscles of the inner thighs (adductors).

Getting tired of doing the triangle and revolving side angle all the time in your vinyasa classes?  The next time you get to the twisty portion of your standing pose sequence, give this one a try for variety!

Kevan Gale Demonstrating the Twisting Horse Stance

What’s your favorite standing pose?

Link

Epic Yoga Playlist

Are you ready to get your vinyasa on?

This playlist is one of my recent favorites with  lots of great upbeat electronica material up front to complement standing poses, and a selection of more melodic pieces to accompany seated work and savasana toward the second half.

Check it out here:

David Magone’s PVYU Playlist

Want to stay updated on all things PranaVayu?  Like us on Facebook!

What songs do you love to move to?  If you’ve got something great, be sure to share!

Upcoming Workshops with David Magone:

March 9 – 11, 2012:   Learn universal principles of Hardcore Alignment at Exhale Spa Boston.  Open to students and teachers from any style.


Oh, My Aching Back!

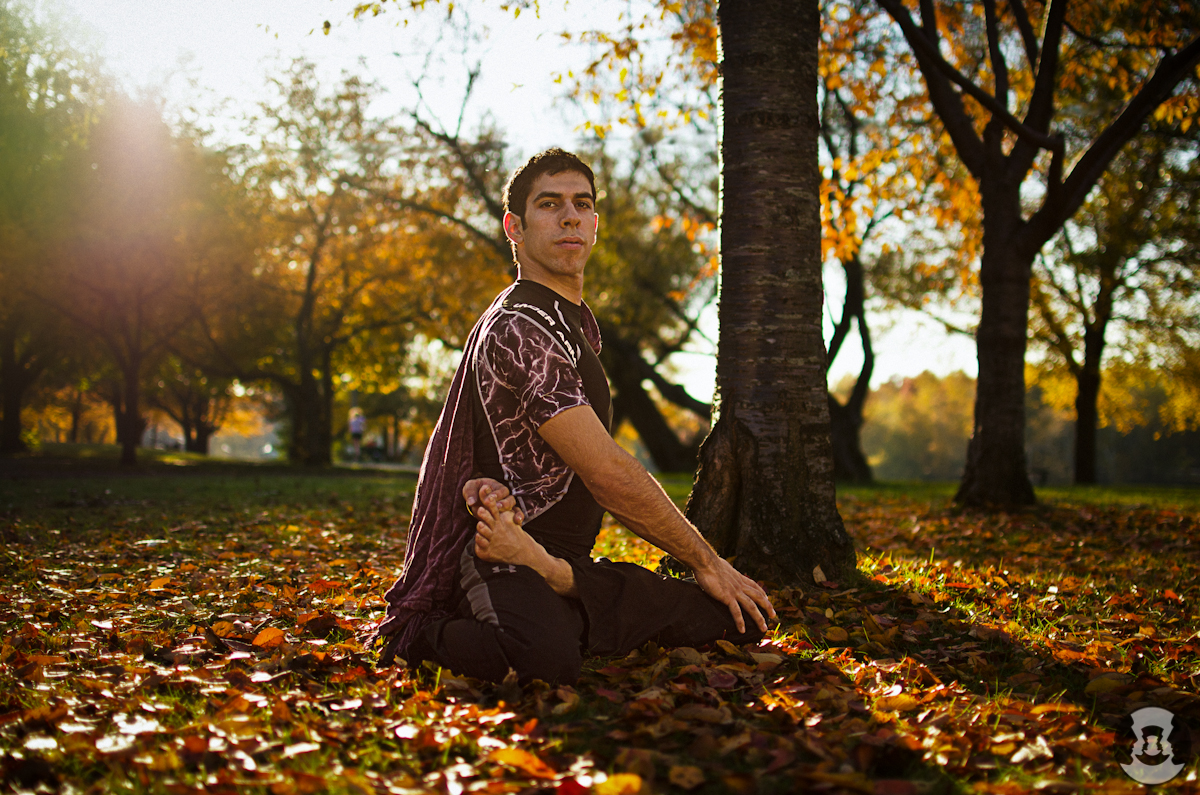
Yoga has increased in popularity in recent years, and more people are now hitting the mat than ever before. Because yoga provides so many valuable tools for mind body health, more  people are turning to yoga as their primary form of physical fitness with numerous practitioners reporting between four and six days of practice per week spent on the mat.

All in all, I think that this increase in practice is great… I love all things yogic, and I’m really excited to see so many people getting really excited about these things as well.  However,  I’ve also I’ve noticed that this increase in practice volume seems to be creating problems for many people.  I regularly find that those who practice six or seven days per week seem to be more likely to report wrist problems, aches and pains in the lower back, and muscle pulls of all varieties.   I’ve known many a yogi who has had to quit in the middle of a 108 day yoga challenge because their hamstrings were so cooked that they simply couldn’t consider the possibility of another day of forward folding.

When viewed from a physiological perspective, it isn’t  too terribly surprising that these types of injuries are occurring in serious yoga practitioners. Regularity in practice is critical if you wish to transform through yoga practices, but it IS nevertheless possible to have too much of a good thing.  Your body needs time to recuperate after exercise.  Neglect this need, and you will eventually get injured.  To that point Jeff Chandler emphasizes that stretching too frequently can be injurious because  “Passive stretching can create large tensile loads in the muscle, so it is possible to weaken and injure muscle with vigorous stretching programs. Stretching exercise is like any other training stimulus in that it results in temporary weakening before the body recovers and supercompensates for that activity” (Chandler, 174).

The temporary weakening  that occurs after stretching is no big deal as long as the muscles have time to rest and recover.  It’s also not as much of a problem if you are pursuing a gentler form of practice.  However, problems begin to occur when you repetitively stress muscles, (say for example in by doing an active vinyasa class for 108 days consecutively) without giving them a break by either resting entirely for 48 hours after you practice or by offering training variety in the form of cross-training practices designed to counterbalance areas of potential weakness.

To avoid some of the problems associated with overtraining, Periodization godfather Tudor Bompa recommends that you organize a training program that “stresses the athlete to provide the stimuli for adaptation, [while] alternating rest periods with work periods” (Bompa, 119).   If you wish to apply this to yoga practice, this can be accomplished by alternating days of intensive physical practice that emphasize stretching with days that focus on active rest or strength building and cross-training practices designed to stabilize areas such as the wrists, low back, neck and knees.

In my experience practicing in this way can reduce inflamation, stabilize areas of chronic weakness and decrease the likelihood of nagging injures turning into chronic pain.  If you have some area of chronic discomfort that just won’t seem to go away, then you should definitely consider giving this type of practice planning a try.

So how do I do this?

1.  Alternate what you practice

 Give your body time to rest from intensive stretching by alternating your vinyasa yoga practice with strength building or cross-training practices.   For example, you might consider doing a vinyasa practice on Monday, Wednesday and Friday and strength building/cardio conditioning with kettlebell practices on Tuesday and Thursday.

2.  Stretch in the morning and stretch in the evening. 

  Research suggests that  people who stretch a muscle every day gain range of motion no faster than those who stretch  just three times per week provided that you stretch twice per day.  This is a great opportunity to train smarter rather than harder!  Rather than repeating the same stretching routine every day, shake it up by giving yourself a few days off per week.  Your body will love you for it, and you’ll progress just as quickly.  If you decide to do this, spend a little extra time on those days that you decide to go to class stretching for 15 or 20 minutes at home to release those areas in your body that feel stuck or tight.

3.  Repeat the same practice three times per week for optimal effect

Generally speaking, any physical exercise must be repeated at least twice per week in order to have a transformative effect.   To make sure that your muscles are stretched frequently enough to adapt, consider creating a yoga sequence that you will stick with for at least three weeks.  Practice the  sequence that you create at least three times per week with a few days off for rest and you’ll see good results in no time.

 Does this mean that I should never practice six days per week? 

 Not at all.  It is possible to practice active vinyasa yoga six days per week, but doing so requires a different type of weekly training plan.  Interested?  Check in soon for more details!


Breathe Your Way to a Healthy Heart!

Did you know that  yoga practice can lower the levels of free fatty acids, cholesterol and triglycerides in the blood stream when combined with pranayama?    Since high lipid levels can increase your risk for heart disease, moving AND breathing should form an important component of a preventative maintenance program that includes proper diet, stress reducing lifestyle choices, and mental relaxation techniques.

Not sure of where to start?  Give these two exercises a try!  

The Breath of Equal Duration:  (Sama Vrtti Pranayam)

Find a comfortable seated position.  Sit up tall and close your eyes.  Slowly begin to modulate the overall length of your breath by inhaling to a slow count of four.  Fill your lungs completely, and then exhale to a count of four and empty your lungs all the way.   Once this begins to feel comfortable, expand the count to 5:5, 8:8, etc. as appropriate.

At first practice the Breath of Equal Duration for two minutes at a time.  Work up to five minute sessions as you become more comfortable with the practice.

The Skull Shining Breath (Kapalabhatti Pranayam) 

**This breath is contraindicated for expectant mothers.

This exercise consists of quick rounds of exhales taken through the nose. To begin, inhale to your fullest capacity.  Exhale half of your air.  Once the lungs have emptied halfway, press a quick burst of air out through your nose by pressing your belly muscles quickly downward and inward. To inhale, relax your belly and let your lungs effortlessly fill to the halfway point again.  Practice repeating this cycle of active exhales and passive inhales at a slow rate until you get the hang of it.  With practice, you can take approximately one exhale per second.

Repeat twenty five to fifty times.  Build up to three rounds of fifty repetitions.

*For associated research on this topic, see :The Impact Of Pranayama And Yoga On Lipid Profile In Normal Healthy
 Volunteers.” JEP online 2006;9(1):1-6

Link:  faculty.css.edu/tboone2/asep/PrasadV2.doc

Have a happy practice!

David